
Rose Restoration — a Washington DC masonry contractor — explains how to diagnose mortar failure in chimneys, brick stairs, and exterior masonry. Identifying failure early prevents structural damage and water infiltration.
47+ years restoring marble, terrazzo, concrete, and natural stone across DC, MD, and VA.
How to Diagnose Mortar Failure in Chimneys and Brick Stairs
Mortar failure is one of the most consequential maintenance issues a homeowner can face — and one of the most commonly overlooked. Unlike a leaking faucet or a broken window, deteriorating mortar is easy to dismiss as cosmetic. The joints between bricks look a little rough, a little crumbly. A few pieces of white powder are showing up at the base of the chimney. It can wait until next season.
It cannot. Mortar failure in a chimney or on brick stairs is a structural and safety issue. Left unaddressed, it allows water into the masonry assembly, accelerates freeze-thaw deterioration, compromises the structural integrity of the chimney and the stability of the stair, and can lead to serious collapses or interior water damage that costs far more to remediate than the original repointing would have.
This guide is for Washington DC, Maryland, and Northern Virginia homeowners who want to understand what mortar failure looks like, what causes it, and when to call a professional. Rose Restoration repoints chimneys and brick stairs throughout the region, and we have seen the full spectrum of mortar failure conditions — from joints that are simply worn and ready for routine repointing to chimneys that are on the verge of catastrophic failure. Knowing the difference matters.
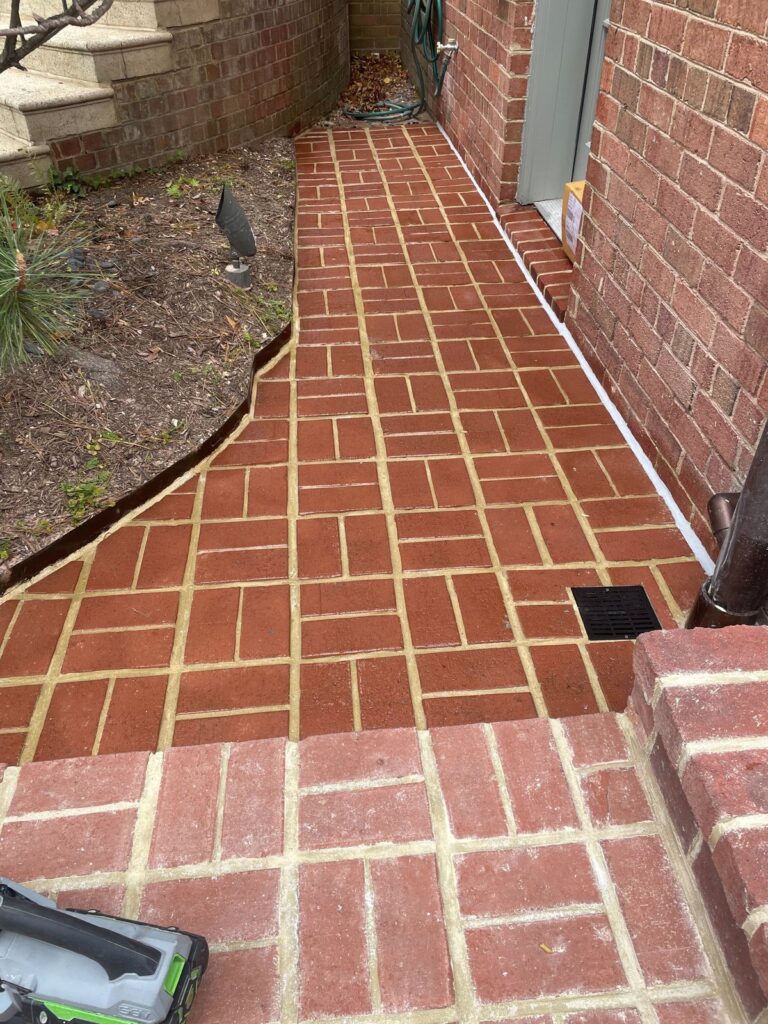
What Mortar Failure Looks Like: Signs to Inspect For
Mortar failure is not always obvious from street level. A chimney that looks intact from the ground may have significant joint deterioration that is only visible up close. Regular inspection — at least annually, and after significant weather events — is the best way to catch problems early.
Crumbling or Recessed Joints
Healthy mortar joints should be slightly recessed or flush with the face of the brick, firm to the touch, and free of cracks or voids. When mortar begins to fail, it softens, crumbles, and recedes deeper into the joint. In advanced cases, you can insert a key or screwdriver tip into the joint with minimal resistance. This is a clear indicator that the mortar has lost its binding strength and is no longer performing its structural function.
Missing Mortar
Missing mortar — visible gaps between bricks with no mortar fill — represents a more advanced stage of failure. At this point, each brick in the affected area is essentially unsupported on the sides where mortar is absent. The masonry assembly is relying entirely on the remaining courses of brick and mortar to maintain structural integrity. Water is freely entering the assembly every time it rains.
Efflorescence: White Powder or Crusting
Efflorescence is the white, powdery or crystalline deposit that appears on masonry surfaces when water-soluble salts are carried to the surface by moisture movement. On a chimney or brick stair, efflorescence signals active moisture infiltration through the mortar joints or the masonry units themselves. It is not structurally dangerous in isolation, but it is a reliable indicator that water is moving through the assembly — and that freeze-thaw damage, mortar deterioration, and eventual structural problems are either occurring or imminent.
Heavy efflorescence at the base of a chimney, or running down the face of brick stairs, deserves prompt investigation. The source of moisture needs to be identified and addressed, not just the surface deposit.
Leaning, Bulging, or Displaced Bricks
Bricks that are leaning out of plane, bulging outward from the face of a chimney or stair wall, or visibly displaced from their original position indicate that the masonry assembly has lost structural coherence. This is a serious condition. A leaning section of chimney or a bulging stair wall can fail suddenly and without further warning. If you observe this condition, particularly on a chimney, the safest course of action is to stop using the fireplace immediately and contact a professional for an urgent assessment.
Gaps Between Bricks and Adjacent Materials
Gaps between the brick masonry and adjacent materials — where the chimney meets the roof flashing, where brick stairs meet a foundation wall, or where masonry transitions to a different material — are significant entry points for water and indicators of structural movement. These gaps often develop because the masonry and the adjacent material move at different rates due to thermal expansion, settlement, or frost heave. Filling these gaps is part of a comprehensive repointing and repair scope.
What Causes Mortar to Fail
Understanding the causes of mortar failure helps homeowners make sense of why failure is occurring and what might need to be addressed beyond the mortar itself to prevent recurrence.
Freeze-Thaw Cycling
The most pervasive cause of mortar deterioration in the Washington DC metro area is freeze-thaw cycling. When moisture infiltrates mortar joints and the temperature drops below freezing, that moisture expands as it freezes — exerting pressure on the mortar and the adjacent masonry units from within. Over many cycles, this expansion fractures the mortar, progressively reducing it to loose, crumbly material. The DC area experiences a significant number of freeze-thaw cycles each winter, particularly in the transitional months of November, December, March, and April when temperatures oscillate around the freezing point. Masonry that is exposed and unprotected — chimneys, freestanding stairs, retaining walls — is particularly vulnerable.
Water Intrusion
Mortar that is saturated with water deteriorates more quickly than mortar in a relatively dry condition. Water intrusion in a chimney can come from multiple sources: precipitation entering the flue opening, failed or improperly installed flashing at the roof, a cracked or missing chimney crown, and deteriorated mortar joints themselves. Each of these entry points allows water into the masonry, accelerating mortar breakdown and creating the conditions for freeze-thaw damage.
Wrong Mortar Type
Not all mortar is appropriate for all applications, and using the wrong mortar type is one of the most common sources of premature failure — particularly following amateur or uninformed repairs. Pre-mixed mortar products sold at hardware stores are often formulated with Portland cement as the primary binder, producing a mortar that is quite hard and strong. This sounds desirable, but in masonry assemblies — particularly older brick construction — a very hard mortar creates problems. Brick expands and contracts with temperature changes. If the mortar is harder and more rigid than the brick, that movement cannot be absorbed in the joint, and instead the brick face spalls off. This is why historic masonry guidelines specify softer, lime-based mortars for work on older buildings.
We have written a detailed technical post on mortar selection for those who want to go deeper on this topic: Mortar Types Explained: How We Match Color, Sand, and Strength for Masonry Repointing.
Age and Natural Weathering
Even well-installed, properly specified mortar has a finite service life. Type S lime-based mortars in exterior applications typically last 25 to 50 years before requiring repointing, depending on exposure conditions and maintenance history. Chimneys, which are fully exposed to weather from all sides and subject to thermal stress from the flue gases within, often reach the end of their mortar service life faster than protected masonry. A chimney built in the 1960s or 1970s that has never been repointed is overdue for attention.
Settlement and Structural Movement
Foundation settlement, soil movement, and differential thermal expansion between a masonry assembly and adjacent structural elements can open cracks in mortar joints that water then exploits. Settlement-related mortar cracking often follows a diagonal or stepped pattern, following the mortar joints in a stair-step sequence that reflects the direction of movement.
Chimney-Specific Issues
Chimneys deserve particular attention because they are fully exposed to weather on all sides, they are subject to thermal stress from use, and mortar failure in a chimney can have consequences that extend well beyond the chimney itself — including interior water damage and, in severe cases, structural collapse.
Chimney Crown Damage
The chimney crown is the concrete or mortar cap that seals the top of the chimney structure around the flue liner. Its purpose is to shed water away from the flue opening and prevent moisture from penetrating the top course of bricks. A cracked or crumbling chimney crown is one of the primary entry points for water in a deteriorating chimney. Crown damage is often not visible from the ground and requires a close-up inspection — from a ladder or the roof — to identify. Signs of crown failure may include efflorescence below the crown, staining on the upper courses of brick, and visible cracks or missing sections of the crown cap.
Flashing Failure
Flashing is the metal (typically lead, aluminum, or copper) seal between the base of the chimney and the surrounding roofing material. It is installed in two layers — base flashing and counter-flashing — to accommodate the differential movement between the chimney and the roof structure. When flashing fails — through corrosion, improper installation, mortar cap failure, or the movement of the chimney relative to the roof — water enters at the roof line and travels into the attic and wall assembly below. Flashing failure can cause significant interior water damage while the chimney masonry itself looks intact from the outside. Discoloration on interior walls or ceilings near the chimney is a warning sign that warrants investigation.
Water Infiltration to Interior
A chimney with advanced mortar failure is not just a structural problem — it is a moisture problem that will eventually manifest inside the home. Water traveling through deteriorated mortar joints reaches the interior wythe of the chimney, then migrates into the surrounding framing and plaster or drywall. Staining on ceilings or walls adjacent to the chimney, musty odors in the room containing the fireplace, and visible water seeping from the firebox during rain events are all signs that water infiltration is already occurring. At this stage, the remediation scope extends beyond repointing to include interior moisture remediation and potentially framing repairs.
Brick Stair-Specific Issues
Brick stairs present a different set of failure modes than chimneys, shaped by their function, their geometry, and the specific stresses they experience.
Step Movement and Instability
Brick stair treads that rock, shift, or feel soft underfoot indicate that the mortar bed supporting them has failed or that the structural fill beneath the stair has settled or eroded. This is both a safety hazard and a maintenance issue. A stair tread that shifts under load is a tripping hazard, and the movement it makes every time someone steps on it further degrades the mortar and accelerates deterioration. Loose stair treads should be repaired promptly rather than marked with a cone and deferred.
Railing Looseness
Metal railings set in brick or stone masonry rely on the structural integrity of the surrounding masonry to remain stable. When mortar fails around a railing post anchor, the railing becomes loose — which is a direct safety hazard for anyone using the stair. Loose railings should be treated as an urgent repair item, not a cosmetic deficiency. The repair involves removing the deteriorated mortar from around the post, cleaning the anchor, packing fresh mortar in lifts to restore proper density, and allowing adequate curing time before the railing is returned to service.
Trip Hazards from Heaving and Settlement
Frost heave and soil settlement can raise or lower individual stair treads out of level, creating uneven risers and potential trip hazards. Stair geometry that was uniform when the stairs were built can develop significant inconsistencies over years of frost cycling, particularly on older stairs that were not built over an adequate frost-depth foundation. In severe cases, restoring consistent riser heights requires lifting and releveling individual treads — a scope of work that involves mortar removal, base correction, and reset.
Why DIY Repointing Often Fails
Repointing looks straightforward: remove old mortar, pack in new mortar, done. In practice, the most common DIY repointing attempts fail within one to three seasons, often leaving the masonry in worse condition than before the attempt. Understanding why helps clarify what professional repointing actually involves.
Inadequate Joint Preparation
The most critical step in repointing is joint preparation. Old mortar must be removed to a minimum depth of approximately three-quarters of an inch — some guidelines specify one inch — to provide adequate mechanical keying for the new mortar. Mortar packed over a shallow scratch in the old joint will not bond properly and will delaminate quickly, often within a single freeze-thaw cycle. This depth of removal cannot be accomplished with a cold chisel and hammer without significant risk of damaging the brick faces. Proper preparation requires angle grinders with tuck-pointing blades or oscillating multi-tools for tight or delicate joints — tools that most homeowners do not own and have not been trained to use safely in masonry applications.
Wrong Mortar Selection
Hardware store mortar mixes marketed as “general purpose” or “all-purpose” are typically high-Portland cement formulations that are too hard for most exterior masonry repointing applications, particularly on older brick. Applying this mortar to a historic chimney or pre-war brick stair will cause the brick faces to spall as thermal movement is transmitted into the masonry unit rather than absorbed in the softer joint. Selecting the right mortar requires knowing the age of the masonry, the brick type, and the exposure conditions — and then matching a mortar to those parameters. This is not guesswork; it is technical knowledge developed through training and experience.
Poor Color and Texture Matching
Even a structurally correct repointing job will look wrong if the mortar color and texture are not matched to the existing joints. Mortar color is determined primarily by the aggregate (sand type and particle size), the binder proportions (cement to lime ratio), and any added pigments. Achieving a visually compatible result requires access to the right sand types, knowledge of how specific mortar proportions relate to color, and the ability to produce and evaluate test batches before the full repair is applied.
Schedule a Masonry Assessment
If you're seeing signs of mortar failure — crumbling joints, gaps in brickwork, efflorescence, or leaning chimneys — it's time for a professional assessment. We provide free on-site evaluations.
The Professional Repointing Process
Professional repointing on a chimney or brick stair begins with an assessment that determines the mortar type needed, the extent of deterioration, and any underlying issues — crown condition, flashing, drainage — that need to be addressed alongside the mortar work.
Joint preparation is completed mechanically, to the correct depth, with careful attention to avoiding damage to brick faces. On a chimney, this work is performed from staging or a ladder by experienced technicians who are comfortable working at height with power tools.
Mortar is prepared in the correct formulation and consistency for the application — not too wet (which causes shrinkage and poor bonding) and not too stiff (which inhibits proper packing and adhesion). It is packed into the prepared joints in lifts, with each lift allowed to take initial set before the next is applied for deep joints. The joint surface is tooled to match the profile of the original — whether that is a concave, flush, or weathered joint — and finished to achieve a color and texture consistent with the surrounding mortar.
For general contractors who manage masonry work on larger projects, we have published detailed guidance on professional repointing standards: What General Contractors Should Know About Repointing, Mortar Matching, and Masonry Restoration Protocols.
When Mortar Failure Is a Safety Emergency
Most mortar failure conditions are serious but not immediately dangerous — they warrant prompt professional attention but do not require emergency action. However, certain conditions do constitute a safety emergency that should prompt immediate action.
Stop using a fireplace immediately if the chimney shows visible leaning, bulging, or displacement in any course of bricks. A structurally compromised chimney can fail during use, when the thermal expansion of a fire adds stress to already-weakened masonry. Displaced or leaning chimney sections can collapse inward into the flue or outward onto the roof or adjacent areas.
Treat a brick stair with loose railings as an urgent safety issue, particularly in a multi-unit or commercial property where liability for injury is a consideration. A railing that pulls away from the wall under load can cause a serious fall. The repair is straightforward; the risk of deferring it is not proportionate to the cost of addressing it.
Large sections of missing mortar — joints that are completely empty for a significant run of masonry — represent a structural condition that should be evaluated by a professional promptly. Large voids in the joint system mean that the masonry units in that area are essentially unbound. The masonry is maintaining position through friction, gravity, and the remaining bonded courses above and below — not through the structural system it was designed to rely on.
Mortar Failure in the DC Climate
Washington DC's climate is especially hard on mortar — hot humid summers, cold wet winters, and dozens of freeze-thaw cycles per year accelerate deterioration. We see the worst mortar failure on north-facing walls in Georgetown, exposed chimneys in McLean and Great Falls, and basement-level masonry throughout Capitol Hill and Arlington. If your mortar is crumbling, don't wait — water infiltration causes exponentially more damage over time. Free masonry assessment →
Rose Restoration serves homeowners and commercial property owners throughout Washington DC, Maryland, and Northern Virginia. If you have observed any of the conditions described in this guide — crumbling joints, missing mortar, efflorescence, displaced bricks, loose railings, or stair treads that move underfoot — contact us for a professional assessment. Call us at 703-327-7676 or use the link below to request a free quote.
Frequently Asked Questions
How do I know if my chimney mortar failure is a safety emergency or a routine maintenance issue?
Routine mortar deterioration — joints that are crumbling, recessed, or showing early efflorescence — is a serious maintenance issue that warrants professional attention but does not require stopping fireplace use immediately. A safety emergency exists when you observe visible structural displacement: bricks that are leaning outward, sections of the chimney that bulge from the face, or entire courses of brick that appear to have shifted from their original position. In these cases, stop using the fireplace immediately and arrange for a professional inspection before next use. If in doubt, erring on the side of caution and having the chimney evaluated before lighting another fire is always the right call.
Can I repoint my chimney or brick stairs myself?
Small areas of localized mortar deterioration — a single joint or a small patch — can be addressed by a homeowner who is willing to properly prepare the joint to the required depth and select a mortar formulation appropriate for the application. For chimney work specifically, we would caution most homeowners against DIY repointing: chimneys require working at height with power tools, mortar selection is particularly consequential given the thermal stresses involved, and the consequences of a failed repair (continued water infiltration, further structural deterioration) are significant. For any substantial scope of mortar failure — covering more than a small, easily accessible area — professional repointing is the appropriate choice.
What is the difference between repointing and tuckpointing?
The terms are often used interchangeably, but they technically refer to different things. Repointing means removing deteriorated mortar from existing joints and replacing it with new mortar — the standard repair for mortar failure. Tuckpointing, in its original sense, is a decorative technique where mortar joints are filled with two colors of mortar to create the visual impression of very fine joints — historically used to make cheaper brick look more refined. In modern usage, particularly in the United States, “tuckpointing” is widely used to mean the same thing as repointing. When you see a contractor advertise “tuckpointing” for chimney or stair repair, they almost certainly mean repointing.
How long does professional chimney repointing last?
A professional repointing job using correctly specified mortar and proper joint preparation should last 25 to 50 years in most exterior applications. The range reflects differences in exposure, mortar formulation, the quality of the original brick, and the effectiveness of addressing any underlying moisture issues at the time of repointing. Chimneys that are fully exposed, subject to heavy precipitation, and used frequently for fires may reach the shorter end of that range. A chimney that was repointed with the correct mortar, had its crown and flashing addressed at the same time, and is in a relatively sheltered position can easily reach the upper end. Annual inspection to catch early signs of deterioration is the best way to maximize the life of any repointing investment.
Why does the mortar keep failing in the same spot on my chimney or stair?
Recurring mortar failure in a specific location almost always indicates an unresolved moisture source. Common causes include a failed or missing chimney crown allowing water to enter from the top, damaged or improperly installed flashing at the roof line, a low point in the stair geometry where water pools rather than draining, or water wicking up from saturated soil at the base of a stair. If mortar repairs in a particular location are failing repeatedly, the repair scope needs to expand beyond repointing to include diagnosis and correction of the moisture source — otherwise the cycle will continue regardless of how well the mortar work itself is executed.
Get a Free Assessment from Rose Restoration
Tell us about your marble, stone, terrazzo, or concrete and our senior technicians will recommend the right restoration approach. Family-run and trusted across Washington DC, Maryland, and Virginia since 1978.
Call (703) 327-7676 · Email info@roserestoration.com · or send us photos.

christos
Rose Restoration International — 47 years restoring surfaces across the capital region.
Keep reading
Restore. Don't replace.
47 years of polishing marble, terrazzo, concrete, and tile across Washington DC, Northern Virginia, and Maryland. IMF, Four Seasons, Smithsonian, and the Virginia State Capitol trust us — you can too.