

Polished concrete floors have become a top choice for commercial buildings, retail stores, industrial warehouses, and even modern homes. Known for their sleek appearance, durability, and low maintenance requirements, these floors offer both aesthetic appeal and high performance.
When properly polished and sealed, concrete floors can withstand heavy foot traffic, spills, and industrial wear and tear, making them ideal for high-use environments. Beyond durability, polished concrete is eco-friendly, reflecting light to brighten rooms and reduce energy costs.
This guide will walk you step-by-step through the concrete polishing process, covering the tools, techniques, and products used to transform a plain slab into a beautiful, high-performance floor.

Initial Surface Preparation: Grinding the Concrete
The first step is grinding, which prepares the floor for polishing by removing surface imperfections and creating a smooth foundation.
Why Grinding is Critical
Removes coatings, adhesives, dirt, and debris.
Eliminates cracks, chips, and uneven spots.
Opens up the concrete surface for densifiers and sealers to penetrate effectively.
Heavy-duty grinding machines equipped with diamond grinding pads are used for this stage.
Coarse grits tackle rough, damaged areas.
Finer grits smooth the surface gradually for a uniform base.
For large commercial projects, planetary head grinders ensure even, consistent results.
Pro Tip: Proper grinding sets the foundation for the entire polishing process. Skipping or rushing this step can compromise the final finish.
Honing the Concrete: Smoothing the Surface
After initial grinding, the process transitions to honing, which uses finer-grit diamond pads to smooth and refine the concrete further.
Honing Benefits:
Closes the pores of the concrete for a denser surface.
Addresses small cracks, pits, or surface blemishes.
Creates a uniform, polished base ready for densifying.
Professionals often fill imperfections with a patching compound during this stage to ensure an even finish.
The honing step is where the floor begins to transform from rough to sleek, setting the stage for high-gloss results.
Applying a Densifier
Once the surface is honed, a concrete densifier is applied. This chemical hardener penetrates deep into the concrete, reacting with calcium hydroxide to form calcium silicate hydrate (CSH).
Why Densifiers Matter:
Increases density and strength of the concrete.
Reduces porosity, making the floor stain-resistant and easier to clean.
Enhances durability for high-traffic commercial spaces like warehouses or retail stores.
By fortifying the floor from within, densifiers extend the lifespan of polished concrete and minimize long-term maintenance costs.
Polishing the Concrete: Creating the Shine
This stage is where the floor truly comes to life. Using progressively finer diamond pads, the polishing machine refines the surface to achieve the desired level of shine.
Customizable Finish Options:
Matte or satin finish: Subtle, natural look for offices or residential spaces.
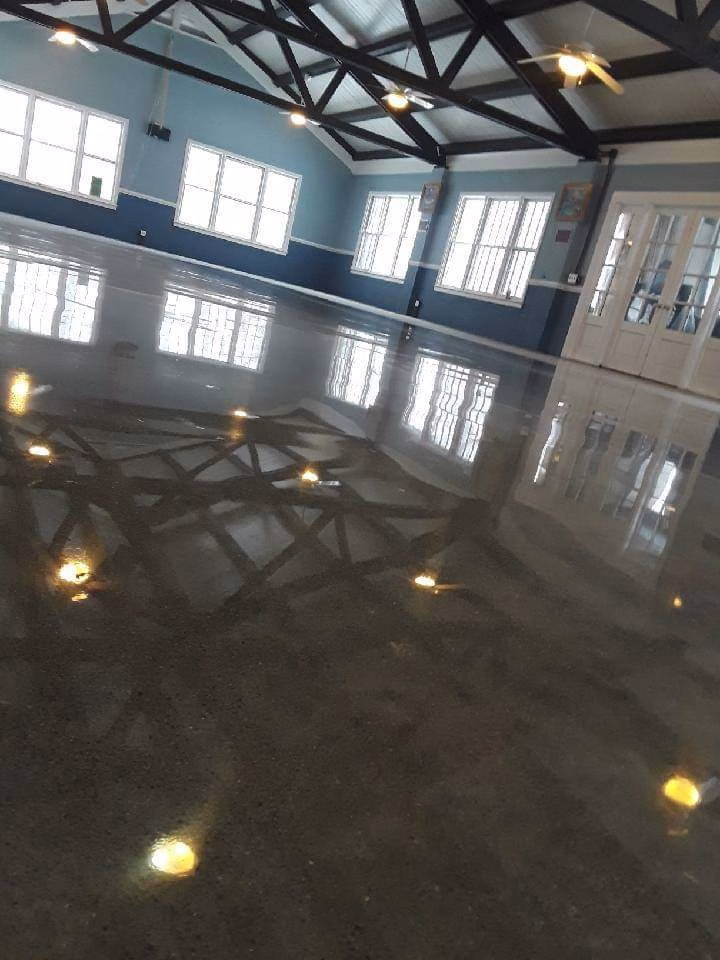
High-gloss finish: Mirror-like, reflective shine ideal for showrooms and luxury settings.
The higher the grit level—sometimes up to 1,500 grit or more—the smoother and shinier the floor becomes.
Polishing also compacts the concrete, making it more resistant to scratches, stains, and wear.
Sealing and Protecting the Concrete
Once the desired shine is achieved, a protective sealer is applied to:
Guard against spills, dirt, and abrasions.
Enhance the appearance of the polished surface.
Simplify ongoing maintenance by preventing debris from embedding into the concrete.
Sealers come in different finishes, from natural matte looks to high-gloss reflective coatings, depending on the aesthetic you want.
Burnishing: The Final Touch
The last step in the process is burnishing, which uses a high-speed burnishing machine to heat and buff the surface.
Burnishing Benefits:
Amplifies the floor’s gloss and reflective quality.
Further compacts the surface, increasing resistance to scuffs and dirt.
Creates a showroom-quality finish perfect for professional spaces.
Think of burnishing as the final polish that takes the floor from great to stunning.
Conclusion
Polishing concrete is both a science and an art. From the initial grinding and honing stages to densifying, polishing, sealing, and burnishing, every step is carefully executed to create durable, stunning floors.
At Rose Restoration, we specialize in transforming dull, worn-out concrete surfaces into high-performance, polished masterpieces. Whether for a commercial warehouse, retail space, or modern home, our team delivers exceptional results designed to last.
Bonus: Fun Facts About Polished Concrete
Here are a few surprising facts about polished concrete floors and why they’re such a popular choice:
Polished concrete is one of the most sustainable flooring options because it uses the existing concrete slab, eliminating waste from additional materials.
Highly reflective surfaces can reduce lighting costs by up to 30% in commercial buildings.
With proper maintenance, polished concrete floors can last 20 years or more without needing replacement.
Densifiers used in the process are non-toxic and eco-friendly, making them safe for residential and commercial spaces.
Polished concrete is low-maintenance, requiring only regular dust mopping and occasional damp mopping with a neutral cleaner.
Popular in warehouses, retail stores, schools, and even luxury homes, this versatile flooring option combines strength and style.
Unlike tile or wood floors, polished concrete doesn’t harbor dust mites or allergens, improving indoor air quality.